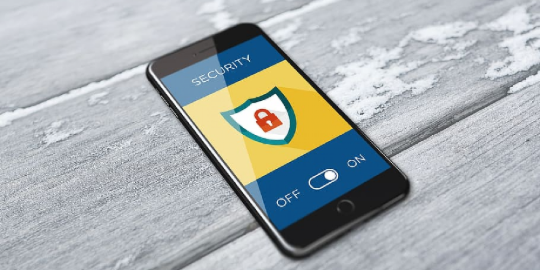
In today's digital age, protecting your personal information and ensuring your safety is more important than ever. With a wide range of security and emergency features available on your iPhone, you can take several steps to safeguard your device and its contents. This comprehensive guide covers 19 essential iPhone security and emergency features that every user should know.
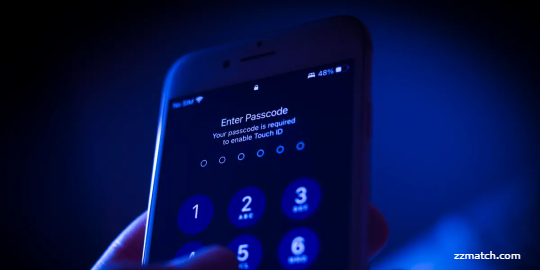
1. Face ID and Touch ID: A Biometric Shield
Highlights:
- Face ID and Touch ID provide an additional layer of security by using biometric authentication.
- They safeguard your iPhone against unauthorized access, protecting your personal information and sensitive data.
- To set up Face ID or Touch ID, go to the "Settings" app, navigate to "Face ID & Passcode" or "Touch ID & Passcode," and follow the instructions.
2. Secure Enclave: Protecting Your Data
Highlights:
- The Secure Enclave is a dedicated chip on iPhones that securely stores sensitive data, such as fingerprint templates and Face ID data.
- It ensures that your biometric information remains encrypted and isolated from the rest of the device.
- This hardware-based security feature provides a higher level of protection against unauthorized access and hacking attempts.
3. Two-Factor Authentication: Adding an Extra Layer
Highlights:
- Two-Factor Authentication (2FA) adds an extra layer of security by requiring a verification code in addition to your password.
- It significantly reduces the risk of unauthorized access to your Apple ID and iCloud account.
Enable 2FA by going to the "Settings" app, tapping on your name, selecting "Password & Security," and following the instructions.
4. Find My iPhone: Locating and Protecting Your Device
Highlights:
- Find My iPhone allows you to track your lost or stolen device using GPS technology.
- You can remotely lock your device, display a custom message on the screen, or erase all data to protect your privacy.
- Activate Find My iPhone by going to the "Settings" app, tapping on your name, selecting "Find My," and enabling the "Find My iPhone" option.
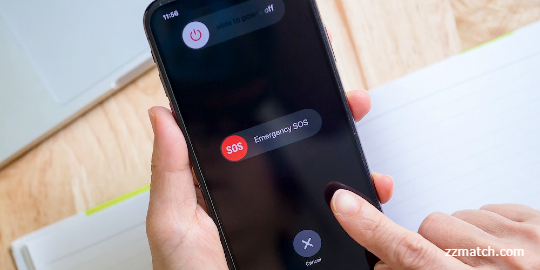
5. Emergency SOS: Swift Assistance in Critical Situations
Highlights:
- Emergency SOS is a life-saving feature that allows you to quickly contact emergency services and share your location with pre-selected contacts.
- To activate Emergency SOS, press the power button five times rapidly or hold the power button and one of the volume buttons together.
- You can customize your Emergency SOS settings in the "Settings" app under "Emergency SOS."

6: Crucial Information at Your Fingertips
Highlights:
- Medical ID stores essential medical information, such as allergies, blood type, and emergency contacts, accessible from the lock screen.
- It enables first responders to quickly access critical information in case of an emergency.
- To set up your Medical ID, open the Health app, tap on your profile picture, select "Medical ID," and fill in the necessary details.
7. Turn on Lockdown Mode
Lockdown mode disables biometric authentication (Face ID or Touch ID) and requires a passcode to unlock your iPhone. To activate Lockdown mode:
- Touch and hold the side key and one of the volume keys.
- Swipe the "Emergency SOS" slider to trigger Lockdown mode
8. Use Safety Check
Safety Check, available in the Apple Watch app, is a monitoring feature designed for users engaging in outdoor activities. In case of a hard fall, Safety Check will send an alert with options to dismiss or contact emergency services.
To enable Safety Check:
- Open the Apple Watch app
- Tap the "My Watch" tab
- Select "Safety"
- Enable "Safety Check"
9. Use Emergency SOS
Emergency SOS allows you to quickly call emergency services by pressing and holding the side button along with either volume button.
Customize Emergency SOS settings through:
- Settings
- Emergency SOS
10. Encrypt your notes
To protect sensitive information in your Notes app:
- Open Notes
- Select the desired note
- Tap the Share icon
- Choose "Lock Note"
- Set a password or use Touch ID/Face ID
11. Automatically install security updates
Keep your device secure by enabling automatic software updates.
- Open Settings
- Tap "General"
- Choose "Software Update"
- Enable "Automatic Updates"
12. Passkeys for apps and websites
Replace traditional passwords with passkeys for enhanced security using iCloud Keychain.
- Open Settings
- Enter your name (Apple ID)
- Tap on iCloud -> Keychain -> Advanced
13. Security Keys for Apple ID
Add an extra layer of protection to your Apple ID by using physical security keys. To set up a security key: Go to appleid.apple.com -> Security section -> Edit. Add a new key under “Security Keys.”

14. Use Advanced Data Protection for iCloud
Advanced-Data Protection in iCloud secures your data by storing it in an encrypted format.
- Go to Settings -> [your name] -> iCloud
- Tap on “iCloud Backup.”
15. Change AirDrop time limit
To adjust the time limit for accepting AirDrop transfers:
- Open Settings
- Tap on "General"
- Select "AirDrop"
- Choose the desired time limit
16. Hide your personal email address
Use Sign in with Apple to hide your email address when creating new accounts or logging into websites and apps.
17. Use iCloud Private Relay
With a subscription to Apple One or iCloud+, you can enable iCloud Private Relay, which encrypts and anonymizes your internet traffic for increased privacy.
- Open Settings
- Tap "Apple ID" (your name)
- Choose "iCloud"
- Select "Private Relay"

18. Hide your IP address
Safari's Intelligent Tracking Prevention feature prevents websites from tracking your browsing activity. Enable it through: - Settings - Safari - Toggle on "Prevent Cross-Site Tracking"
19. Control app tracking
Limit app tracking by adjusting settings under:
- Open Settings
- Tap "Privacy"
- Choose "Tracking"
- Toggle off "Let Apps to Request to Track"
By taking advantage of these iPhone security and emergency features, you can protect your personal information and ensure a safer user experience. Stay vigilant, stay secure!